Whenever I prepare my homemade tomato-based Italian red pasta sauce, I enjoy serving it alongside these delightful Italian-style chicken strips.
This recipe has been a personal favorite of mine for years, not only because it tastes fantastic and uses fresh ingredients but also because it provides an excellent protein addition to an Italian meal. Since my red sauce doesn’t contain protein, these chicken strips complement it perfectly, making the entire meal even more satisfying.
Table of Contents
- Why Choose Boneless Skinless Chicken Thighs For The Recipe?
- The Benefits Of Grating Your Own Parmesan Cheese
- The Choice Of Ingredients In This Recipe
- Serve With Fresh Tomato Italian Pasta Sauce
- Chickpea Flour Breaded Italian Strip Recipe

Why Choose Boneless Skinless Chicken Thighs For The Recipe?
There are several compelling reasons why boneless skinless chicken thighs are the preferred choice in this recipe. As any skilled cook knows, fat equals flavor, making thighs superior to breasts in terms of taste. Here are a few key reasons why chicken thighs excel:

Rich And Intense Flavor
Chicken thighs are inherently more fatty meat cut than white meat, resulting in a deeper and richer flavor. Chicken thighs consistently deliver a mouthwatering and flavorful end product regardless of the cooking method.
Culinary Versatility
Chicken thighs are incredibly versatile and can be prepared using various cooking techniques, such as grilling, sautéing, baking, or braising. Their higher fat content ensures they remain tender and juicy, even when subjected to high heat or longer cooking times.
Enjoyment Over Calorie Concerns
While it’s important to consider calorie intake, it’s also vital to savor life’s pleasures. Chicken thighs may contain more fat and calories than other cuts, but their exceptional taste and tenderness make them a culinary delight worth indulging in.
In summary, choosing boneless skinless chicken thighs enhances the overall flavor profile of the dish, offering a richer, more satisfying experience. These thighs provide culinary flexibility and ensure a delicious outcome, allowing you to savor the joys of a well-prepared meal.
The Benefits Of Grating Your Own Parmesan Cheese
We recommend grating your parmesan cheese in this recipe instead of buying the pre-grated version. Taking a few extra minutes to grate the cheese is worth the effort. Here are several reasons why:

Fresher Cheese
Grating your own Parmesan ensures that you have the freshest cheese possible. Pre-grated cheese often sits on store shelves for extended periods, potentially losing flavor and aroma. You can enjoy the full, vibrant taste of freshly grated Parmesan by grating it yourself.
Improved Melting And Cooking
Freshly grated Parmesan melts more smoothly and evenly compared to pre-grated cheese. This is particularly important when using Parmesan as an ingredient in hot dishes or when you want the cheese to blend into the recipe evenly. Grating it fresh allows for better integration and a more satisfying texture.
Avoiding Additives
Pre-grated Parmesan cheese often contains additives, such as cellulose or anti-caking agents, to prevent clumping. You can eliminate these additives from your dish by grating your cheese, making it a healthier choice for you and your loved ones.
Grating your parmesan means that you are not adding any additional additives to your diet Oen of our great beliefs is Reluctant Low Carb Life is to cut out additives and chemicals from our diet as much as possible.
Enhanced Flavor Experience
When you grate Parmesan cheese yourself, you unlock its full flavor potential. The grating releases the cheese’s aromatic compounds, producing a more rich and enjoyable taste. The freshly grated cheese adds a delightful depth to your recipes that pre-grated cheese may lack.
By grating your own Parmesan cheese, you elevate your dishes’ overall quality and taste. It’s a simple step that guarantees fresher, better-melting, additive-free cheese with a more pronounced flavor profile.
The Choice Of Ingredients In This Recipe
This recipe incorporates a selection of ingredients that contribute to the overall deliciousness of the dish. Let’s take a closer look at each ingredient and why it’s an excellent choice for this recipe:
Chickpea Flour

Instead of using all-purpose flour, this recipe opts for chickpea flour. To enhance its flavor, the chickpea flour is first quickly roasted in a pan before being used to coat the chicken.
Chickpea flour is a fantastic alternative for those following a keto or low-carb diet, as it is lower in carbs than traditional flour options. It adds a unique nuttiness to the chicken, elevating the taste while catering to specific dietary preferences.

Salt And Pepper
Salt and pepper are essential seasonings that play a vital role in enhancing the overall flavor of the chicken. Salt helps to draw out the natural savory notes, while pepper adds subtle warmth and complexity. Their combination creates a well-balanced seasoning that brings out the best in the other ingredients.
Oregano
Oregano, a classic herb in Italian cuisine, imparts its distinct aroma and earthy flavor to the dish. With its Mediterranean essence, oregano beautifully complements the other ingredients. It infuses the chicken with a delightful herbal essence, adding depth and character to its flavor.
By thoughtfully choosing these ingredients, this recipe offers a straightforward yet incredibly satisfying culinary experience. Incorporating boneless, skinless chicken thighs, chickpea flour, salt, pepper, and oregano creates a harmonious blend of flavors and textures that will leave your taste buds longing for more.

Serve With Fresh Tomato Italian Pasta Sauce
This dish pairs exquisitely with our homemade Italian red pasta sauce. The combination of flavors between the succulent chicken and the vibrant tomato-based sauce creates a mouthwatering symphony of taste.
The rich and aromatic sauce beautifully complements the tender, seasoned chicken, resulting in a delightful culinary experience. Prepare to savor the harmonious union of flavors as you enjoy this dish alongside our fresh Italian red pasta sauce.
You can check the Fresh Tomato – Italian Red Pasta Sauce Recipe recipe by clicking here.
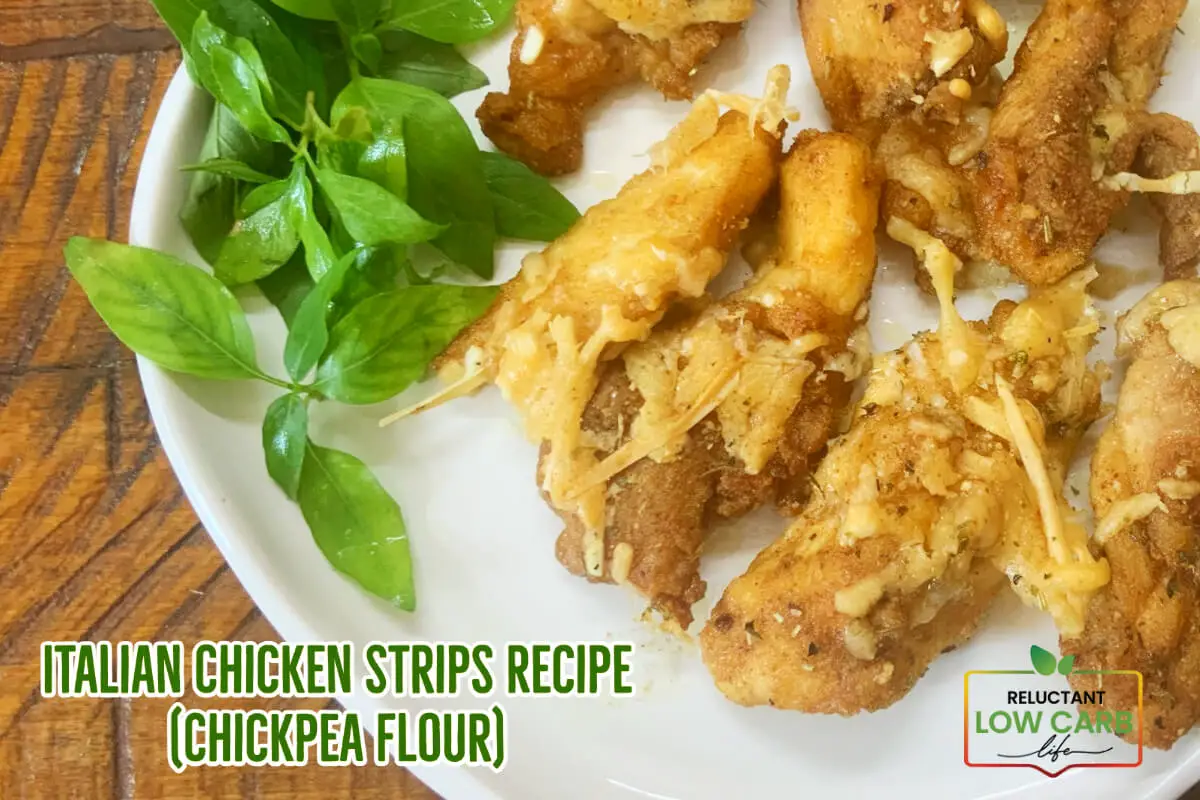
Chickpea Flour Breaded Italian Strip Recipe

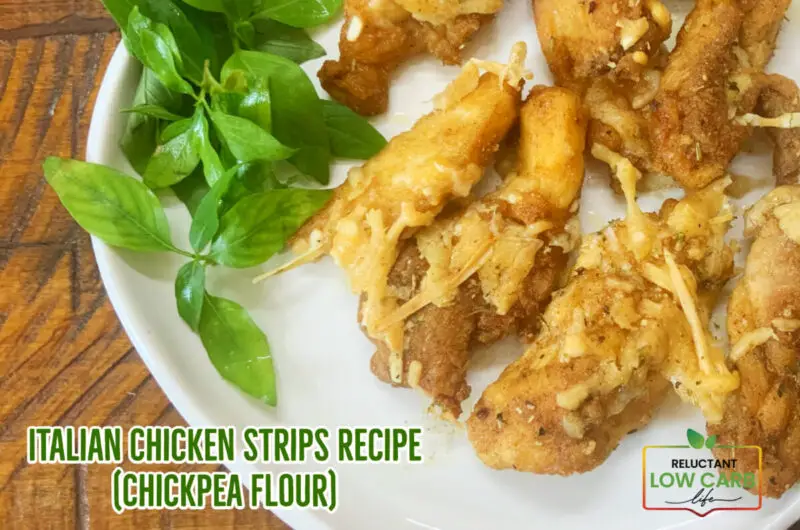
Italian Chicken Strips Recipe
6
servings15
minutes40
minutes55
minutesGet ready to be enthralled by this exquisite Italian chicken recipe. Meticulously crafted using the finest and freshest ingredients, including chickpea flour, it seamlessly complements a variety of Italian dishes, resulting in a harmonious and memorable culinary experience.
Ingredients
2.5 Pound Chicken Thighs
1.5 Cup Chickpea Flour, roasted before using
1 Cup Parmesan Cheese
1 Teaspoon Oregano
1 Teaspoon Salt
Freshly Ground Pepper
Olive oil
Directions
- To prepare the chickpea flour, heat a pan over medium heat. Add the chickpea flour and roast it for approximately 2 minutes, stirring constantly. The flour gradually turns slightly darker in color as it roasts. Be sure to maintain continuous stirring to prevent any burning or uneven roasting. This brief roasting process enhances the flavor and aroma of the chickpea flour, adding a delightful nuttiness to your recipe.
- Slice your boneless, skinless chicken thighs into approximately 2-inch strips. This size ensures the chicken cooks evenly and allows easy handling and serving.
- Coat the chicken thigh pieces in chickpea flour, salt, pepper, and oregano. Ensure each piece is fully coated with the flavorful mixture, providing a delicious seasoning to the chicken before cooking.
- Heat olive oil in a frying pan over medium heat. Carefully place each coated chicken thigh in the pan and fry until the sides turn a beautiful golden brown. The olive oil adds a hint of Mediterranean flavor and helps achieve a crispy exterior while keeping the chicken moist and tender on the inside. Monitor the cooking process closely to ensure the chicken cooks evenly and attains the desired golden hue.
- Transfer the fried chicken thigh pieces to a baking dish and place them in the oven—sprinkle-grated Parmesan cheese generously on top of the chicken. Bake for approximately 30 minutes or until the chicken is fully cooked and the cheese turns beautifully golden and slightly browned on top. This step ensures that the flavors meld together while the cheese forms a delectable crust, adding a delightful savory element. Keep a close eye on the chicken as it bakes to ensure it reaches the desired level of doneness.